Categories
Development General Technology Tutorials

The Most Basic Command-Line Commands

For those new to the terminal/command-line/command-prompt, here is a list of common commands to get you looking like a pro in no time.

What is the Terminal?

The terminal, otherwise known as the command-line, command-prompt, shell, or simply as the console, is a text-based interface for interacting with a computer via the Operating System. You can do most things in a terminal that you can do via the normal, graphical user interface that you interact with every day:

  • Navigate the folders and files on your system
  • Create/Delete/Modify files
  • Install/Remove/Run applications
  • Access information over the internet

At a basic level

Everything on your computer lives in a directory. A directory is another word for folder. Your desktop is a directory, and so is your Documents folder, your Music folder, your Pictures folder, and so on. Every application and file lives in a folder somewhere. Thus, the most important and basic commands (in my opinion) are the commands used to traverse your directories.

A few of notes:

  • The working directory refers to the directory/folder that you are currently in.
  • . represents the directory that you are currently in.
  • .. represents the parent directory of the directory that you are currently in.

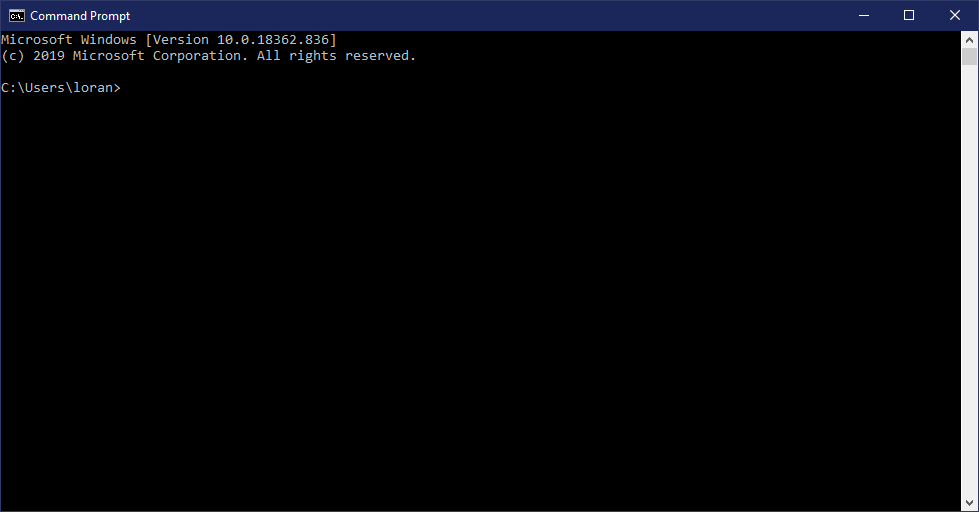
Opening the Terminal

  • Opening the terminal on Windows:
    1. Open the Start Menu.
    2. Search for “cmd”.
    3. Open the “Command Prompt” app.
  • Opening the terminal on Mac: https://www.youtube.com/watch?v=U8qQup7_nuo
  • Opening the terminal on Linux: Ctrl+Alt+t

Generally, when opening the terminal, you land in the HOME directory. The HOME directory is the main (top-level) directory for the current user of the system.

Basic Commands

A list of basic, cross platform (Windows, MacOS, Linux) terminal commands.

pwd

pwd stands for “print working directory.” This command is used to print out the path of the directory (folder) that you are currently in within the terminal. This command does not work in the Windows Command Prompt (see dir).

ls

The ls or list command is used to list the files and folders (sub-directories) of the directory that you are in. This command is for Linux and MacOS systems (there is a different command for the Windows Command Prompt, dir).

If you run ls by itself, you will see a list of the files/folders within the current working directory (the folder that you are currently inside of) in the terminal.

You can list the files/folders of a particular directory by running ls <.../path/to/directory> where <…/path/to/directory> is the path to the directory that you want to look into. For instance, you might run ls ~/myFolder/ to see what is inside the myFolder folder located within your HOME directory (~).

Use ls -a to list all files/folders in the current (or specified) directory. Not all files show up by default, some are hidden (usually those that start with a “.”).

dir

The dir command is used specifically in the Windows Command Prompt to list files and folders within a given directory. The dir command also prints out the path of the current working directory (the folder that you are currently inside of within the terminal).

dir shows all files/folders by default.

cd

The cd command is short for “change directory.” It is used to….. wait for it…. change the working directory. In layman’s terms, it means to move from your current folder into another folder that you specify. Following are a few examples of cd.

cd .

The “.” symbol represents the directory that you are currently in. Running cd . effectively does nothing. You are telling the terminal to move into the directory that you are currently already inside of.

cd ..

Two “.” symbols in succession, “..”, represents the parent directory – the directory that contains the directory that you are in. Running cd .. tells the system to move up to the parent folder.

For example, take a look at the folder structure below. The root folder is the top-level directory. Inside of root, you have bin, modules, public, routes, views, app.js, package.json, package-lock.json, and README.md.

root
    |
    |-- bin/
    |-- modules/
    |   |
    |   |-- module1/
    |       |
    |       |-- index.js
    |       |-- package.json
    |       |-- README.md
    |       |-- LICENSE
    |
    |-- public/
    |-- routes/
    |-- views/
    |-- app.js
    |-- package.json
    |-- package-lock.json
    |-- README.md

Let’s say you had your terminal open, and you were currently inside of the module1 folder. If you ran the cd .. command, you now be in the modules folder. Running cd .. again would land you in the root folder.

cd folder1

Running cd folder1 would move you into the folder named folder1 if there was a folder with the name of folder1 in your current working directory.

cd folder1/folder2

Assuming that folder1 exists in your current working directory, and assuming that folder2 exists as an immediate child folder of folder1, this command, cd folder1/folder2 would move you into folder2.

mkdir

mkdir is short for “make directory.” When running this command, you specify the name of a directory that you want to create. This command creates the directory (folder) as you specify.

  • mkdir myNewFolder creates a new folder called myNewFolder in your current working directory.
  • mkdir folderA/folderB would create a new folder called folderB inside of folderA. If folderA already exists, then it would create folderB inside of the existing folderA, otherwise, a new folderA would be created. (Flip the slash to “\” if you are running this in the Windows Command Prompt).

echo

The echo command is used to print text to the terminal. Running echo test 123, for example, would print “test 123” to the terminal (try it!).

This command is useful within scripts when it is desirable to print output to the console.

exit

Finally exit. This command is used to close the console. Of course, you can always close the console by clicking on the close button, but it looks cooler to close it with exit. Also, the exit command comes in handy when you want to automatically close the terminal upon completion of a script.

End

I will add some more basic commands to this list as I think of them, but my intent here is to provide a simple, basic/starter list of cross-platform commands. From here, anyone should be able to get going!

If you think there is a command that should be included, feel free to comment below!

Thanks for reading!

Resources

Categories
General

Align your Amazon Affiliate Banner in Bootstrap

All credit goes to this website: http://support.moonpoint.com/network/web/html/css/flex-container/. To be honest, the “Moonpoint” site is a bit obscure. I’m not really sure what it is about, but I guess the same could be said about the type-recorder blog too.

The comments/suggestions in this article apply to websites and web applications using Bootstrap (specifically Bootstrap 4.4.1+). These notes may also apply to websites that do not use Bootstrap, but I was using Bootstrap when testing for and writing this article.

The Main Point

You can adjust the alignment (as well as other display features) of your Amazon Affiliate banner using CSS (shocker).

The Amazon Associates Responsive Banners FAQ mentions that the default alignment for a banner is left, but an affiliate may adjust the containing div elements of the banner during installation to alter the alignment to suit the affiliate’s needs.

<div class="alignleft">
     <script type="text/javascript">
       	...
     </script>
     ...
</div>

The above code sample depicts the HTML framework of an Amazon Affiliate banner (when using JS instead of iFrame). Notice the “alignleft” class in the containing div.

What is not mentioned anywhere (except in the obscure blog that I provide the link for above) is that the “alignleft”, “aligncenter”, “alignright” classes do not have any defined styling associated with them in your app unless you’ve explicitly defined styling for these classes in your CSS file… Now, most experienced web-devs could probably figure this out on their own, but sometimes (like me) you just need a little refresher (or a smack on the head).

Wait – What about WordPress?

Good question. It turns out that WordPress has built-in definitions for handling the “alignleft”, “aligncenter”, and “alignright” classes in Amazon Affiliate Banner JS HTML (make sure to note the JS and not iFrame).

Check out the ads that are rendered here on this WordPress page with their respective sizes and classes:

Most Wished for Sofware728×90“aligncenter”
Everything You Need to Upgrade Your PC120×600“alignleft”
Best Sellers in Illustration and Design Software120×600“alignright”
Best Selling Point and Shoot Cameras728×90“alignright”
Amazon Affiliate Banner Advertisements and their respective sizes and styling classes on this WordPress page.

These ads are all being rendered by WordPress’s engine, and they are all responsive (try resizing the page to see). See my notes about what size banners to use for responsive behavior towards the end of this article if you intend to add your own Amazon ads to your blog or site.

And if I’m not using WordPress?

If you are trying to install your banner in your own personal site or app, you’ll have to come up with your own fix until Amazon gives us something.

The Fix

To gain control of your affiliate banner styling/justification in your own personal site or app, you should define styling for the class in the banner’s containing div. Better yet, you should add to or replace the existing class (“alignleft”) with your own class (ex. “aws-flex”) and define the styling for that class inyour CSS file. Here is the styling that I used to center my banner within it’s containing div.

.aws-flex {
     display: flex;
     justify-content: center;
}

And this is what my HTML looked like.

<div class="col"> <!-- Containing div -->
     <div class="aws-flex"> <!-- Previously 'alignleft' -->
          <script type="text/javascript">
       	       ...
          </script>
          ...
     </div>
</div>

Is it Responsive?

No. This fix looks pretty solid on large size screens and/or with banners that do not require resizing fit on all size screens (125×125 for example). However, when you look at the page on mobile, the banners overflow.

A responsive route?

One route to make the banner more “responsive” is to leverage Bootstrap’s Display Properties to hide elements along with the Bootstrap Grid. Essentially, the idea is to show one banner when the view-port is big, and another banner while the view-port is small. Bootstrap’s Display Properties makes this very straightforward. You are going to do some extra work here, but you’ll have a more responsive solution.

Note: It is possible to show different banners for each view-port size (xs, sm, md, lg, xl), but I will illustrate the concept by showing one banner on lg and above view-ports and another banner on less than lg view-ports.

This is basically the idea:

<div class="row">
     <div class="col"></div> <!-- styling div -->
     <div class="col mb-2">
          <!-- ad shown on lg and xl screens -->
          <div class="aws-flex d-none d-md-block">
               <script type="text/javascript">
                    ... <!-- large ad content -->
               </script>
               ...
          </div>
          <!-- ad shown on screens smaller than lg -->
          <div class="aws-flex d-md-none">
               <script type="text/javascript">
                    ... <!-- small ad content -->
               </script>
               ...
          </div>
     </div>
     <div class="col"></div> <!-- styling div -->
</div>

Along with this CSS

.aws-flex {
     display: flex;
     justify-content: center;
}

You can see this concept in action on type-recorder‘s home and about pages.

Alas…

This solution isn’t perfect. If your banner is wider than the view-port, it will get cutoff. It will not overflow, though, and give your page that awkward left/right scroll when viewing on mobile.

My (and Amazon’s) Recommendation

In conclusion, I would also like to note that responsive affiliate banners by Amazon are only recently being developed… I actually thought these would have long existed by now…

Anyhow, Amazon (on its Amazon Associates Responsive Banners FAQ page) recommends that you use Responsive Banners as often as possible (if not everywhere) in your website. As of writing this article, the Responsive Banners are only available in JavaScript (not iFrame!), so make sure to click the JS radio button when copying the link for your website’s banner from the Amazon Affiliate’s hub.

Also, as of writing this article, only 320×50 or 728×90 sized banners are responsive according to the FAQs, and even then, not all of the banners of those sizes are fully responsive.

My recommendation: if you are adding banners to your site, then make sure that you use the JS HTML (not iFrame). Try to stick to the 320×50 or 728×90 sizes whenever possible, or (ideally) use sizes that will not require resizing on mobile along with some creative <div> placement with Bootstrap Display Options. Finally, test on mobile to see how your ads look!

Thanks!

Thanks for reading – I hope this was valuable. If you have additional information concerning this topic to consider, please comment below!

Additional Resources

Categories
General

Hello world!

Hello World! (Recorded on type-recorder)

Hello and Welcome! This is my first blog post. I’m pretty excited.

So, the blog

As mentioned on this blog’s homepage, this portion of type-recorder is the blog. The blog is a space where I can create relevant posts and share topical information (how-to’s, product suggestions, information, and opnions) with whoever wants to know about them.

So, what do I mean when I say “relevant” or “topical”? I mean relevant to type-recorder….. Let’s talk about that first:

What’s type-recorder about?

The app at its core is a node.js application (using Express 4) that converts text into speech. It does this through the use of a cloud text-to-speech service offered by Microsoft Azure. See more on the about page.

Why does the app exist?

We are really drilling down here.

type-recorder exists because ultimately, I wanted to build a web app and practice/improve my development skills.

I wanted to build something straightforward in its intention, yet cool. Plus, I wanted to explore the logistics of a Millennial side hustle – not only developing a website, but also publishing the site/application, obtaining visitors/traffic, monetizing the site through advertisements and affiliations, and so on.

As I continue to develop type-recorder, I continue to see new avenues to explore and learn about things that interest me (including this blog). I did not initially intend on creating this blog, and even as of writing this sentence, I’m not sure if this will go anywhere beyond a few more posts. However, as I was building the application, I thought it would be great to add content to help drive traffic to the site, and what better content than content that interests me? I’m not sure if the app itself will get much traffic. That said, this has been, and still is fun – I’m learning a ton about all sorts of stuff:

  • Custom website development
  • Open source development
  • Application hosting and scaling
  • Cloud application and service providers
  • Website monetization
  • WordPress (and CMS in general)

I hope to keep learning and exploring, and I see type-recorder as a jumping off point for additional goals and projects. I see this blog as a space to share what I’m working on and what I’m learning, and I hope that the content might be valuable and enriching to those who consume it.

What is this blog about then?

This blog is about type-recorder … and other stuff too. As I mentioned on the blog’s home page, I see myself writing about the text-to-speech type-recorder application, open source development, cool products or ideas for developers and content producers (audio/video), Elon Musk, Tesla, and life in general. Hopefully that sums it up.

My goal is to be clear and transparent about my intentions, thoughts, and sources. If you, as a consumer of type-recorder, feel that anything is misrepresented, please don’t hesitate to reach out so that we can have it corrected.

Also, hopefully, I am able to keep creating content for this site… I may very well fall off, but I’ll do my best.

A note about Ads and Affiliate Links

As I mention earlier in this post, part of my goal with this type-recorder project is to monetize my blog (and my effort). That means that a number of my posts will contain advertisements embedded within or around the article.

I do not wish to mislead or misguide anyone, and I ask that any visitors perform their own research before making any purchase decisions and to not rely on my content.

When promoting any products or services in an article, I will note that I am doing so and generally include a sentence like this one at the top of the article, “This article contains affiliate links.”

The Author

I talk a lot about myself in this post… I suppose I should introduce myself.

My name is Loran Saggu, and I am a Salesforce Consultant by trade (born in the cloud!), and I studied Computer Science at Indiana University (go Hoosiers!).

These days, I enjoy tinkering with type-recorder when I have time, and when I’m not behind the computer, I enjoy mountain-biking, hiking, and being away from the computer 😝.

Thanks for reading!