Introduction
As we know, .NET applications require the .NET platform/framework in order to run.
Now, you don’t actually need to install the .NET framework on your Raspberry Pi if you only intend to run self-contained .NET apps deployed to your Pi. However, these self-contained apps will be larger because they need to contain all of the libraries and runtimes that would otherwise be a part of the already installed .NET platform/framework.
So, if you plan to install a number of .NET apps on your Pi, and/or if you really enjoy spending time on your Pi and want to build .NET apps directly on it (maybe using unofficial builds of VS Code or some other editor), you might consider installing .NET Core on your Raspberry Pi. Also, if you simply want to learn more about building/running .NET applications on the Pi, installing .NET Core might be good from an educational point of view.
Let’s look at how to install the .NET platform on the Raspberry Pi.
This walk-through will discuss installing the .NET Core platform on a Raspberry Pi 4. This tutorial assumes that you
- Have a Raspberry Pi (4+)
- That your Pi is setup, hooked up to a monitor, mouse, and keyboard and powered on.
- That your Pi is connected to the internet.
If you don’t have a Pi, consider getting a starter kit! (This is an affiliate link for which I may receive financial compensation if you click on the link and make a purchase on the target website).
.NET Core
There are two options, .NET Core and .NET Framework. The .NET Framework is for use on Windows PCs and devices… The Raspberry Pi, though, is running a Linux based Operating System (Raspbian). Luckily, we have .NET Core available to us – .NET Core is for use on a broader range of devices and computers (not just Windows). Thus, we need to install .NET Core on our Raspberry.
Let’s do it
To install .NET on my Raspberry Pi 4, I followed Edi Wang‘s steps (outlined as follows) in his article Setup .NET Core 3.0 Runtime and SDK on Raspberry Pi 4. I highly recommend reviewing Edi’s post as he shows you how to create a simple console app and ASP.NET web app as well as how to turn your Pi into a web server. I, however, hope to focus (in this post) simply on the installation of .NET Core on your Raspberry Pi.
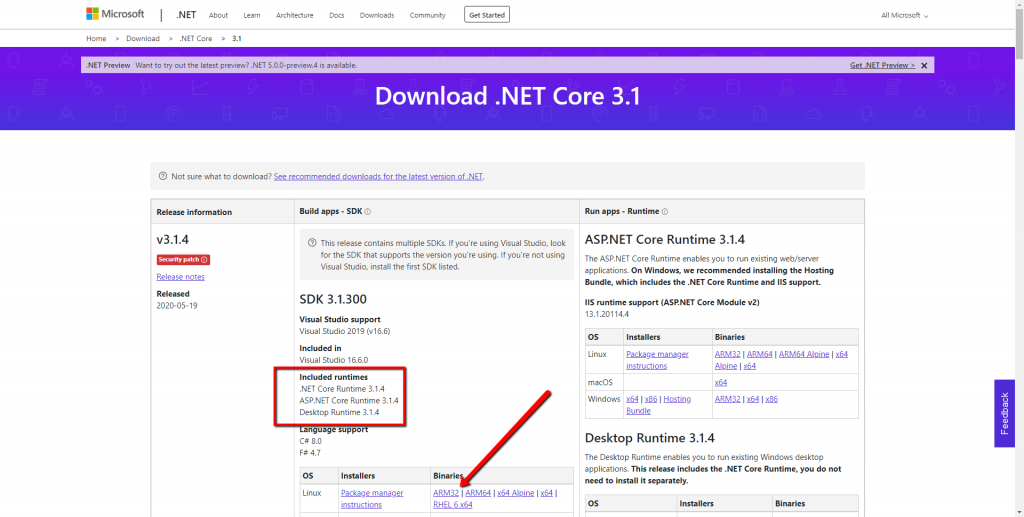
- Download the .NET Core 3.x SDK – Linux ARM 32 Binaries from (see image below) directly onto your Raspberry Pi from your Pi’s browser.
- If you are running Raspbian, you need to use the ARM 32 Binaries. Other Operating Systems might support ARM 64, but I cannot comment on those.
- Note: Edi Wang suggests downloading/installing both the .NET Core 3.x SDK and the ASP.NET Core 3.x Runtime. I do not believe that this is necessary to install both because the .NET Core 3.x SDK claims to include the ASP.NET Core Runtime. The .NET Core 3.x SDK alone should suffice.
- Within the terminal on your Raspberry Pi, in your home directory, create a new folder called dotnet.
- Note: I named my folder dotnet as you can see in the screenshot of the terminal below. Edi Wang named his folder dotnet-arm32 – make sure to use whatever folder name you choose consistently moving forward.
- Note: For those unaware of what I mean by “home directory,” the “home” directory typically is the folder that contains all of the content created by the user of the system. Each time you open a new terminal window, it should open in the “home” directory.
mkdir dotnet- Within your terminal on the Raspberry, navigate to the location of the downloaded ARM32 tar.gz file.
- If you downloaded the binaries directly onto your Raspberry, the zip file should be in the Downloads folder.
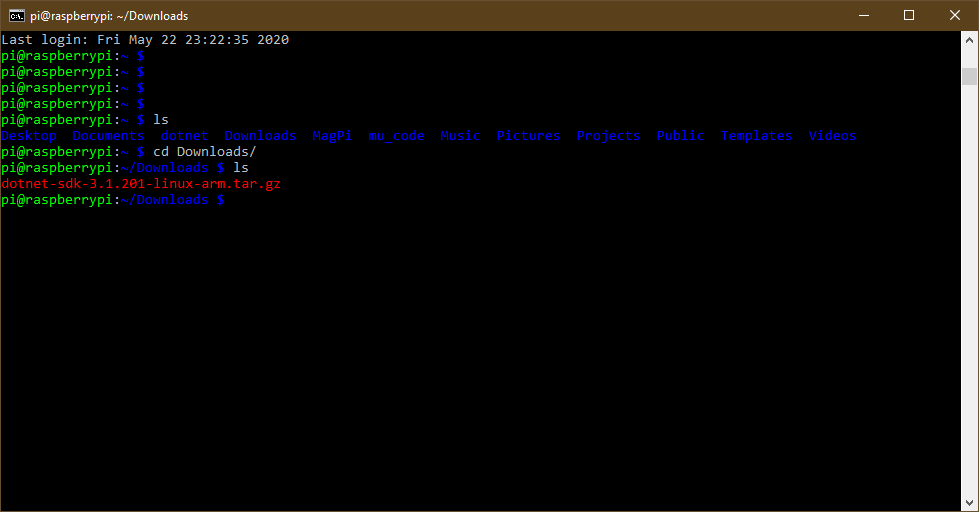
- Unzip the contents of the tar.gz file into your dotnet folder as follows (replace <filename> with the name of the tar.gz file; for example, dotnet-sdk-3.1.201-linux-arm.tar.gz).
tar zxf <filename> -C $HOME/dotnet- Set Environment Variables so that you can reference your newly installed dotnet tool anywhere within your terminal by running the following commands:
export DOTNET_ROOT=$HOME/dotnet
export PATH=$PATH:$HOME/dotnet- Run a test to confirm that .NET is installed on the Pi:
dotnet --info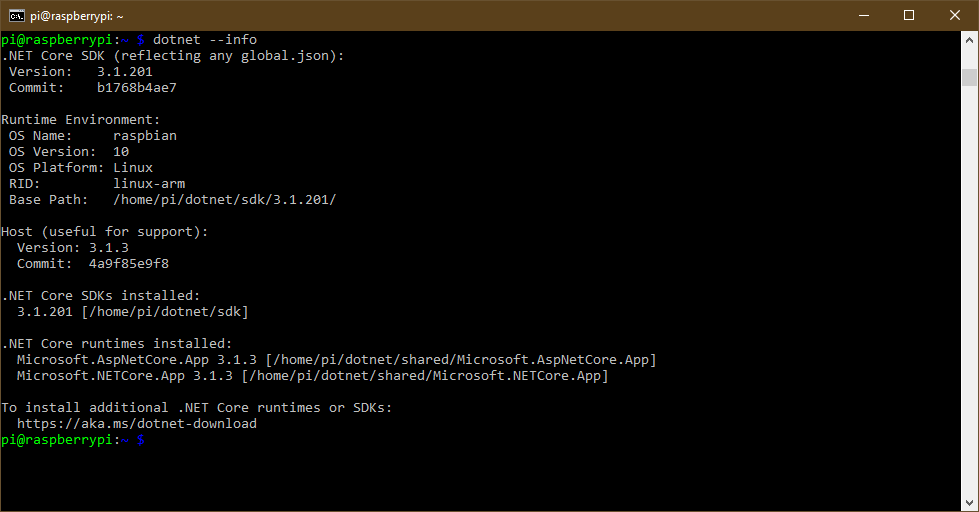
- Update the .profile file with your new Environment Variables.
- From the home directory run
ls -a, you should see a list of all files/folders in the directory (including .profile). - Run the following command to open the .profile file:
nano .profile
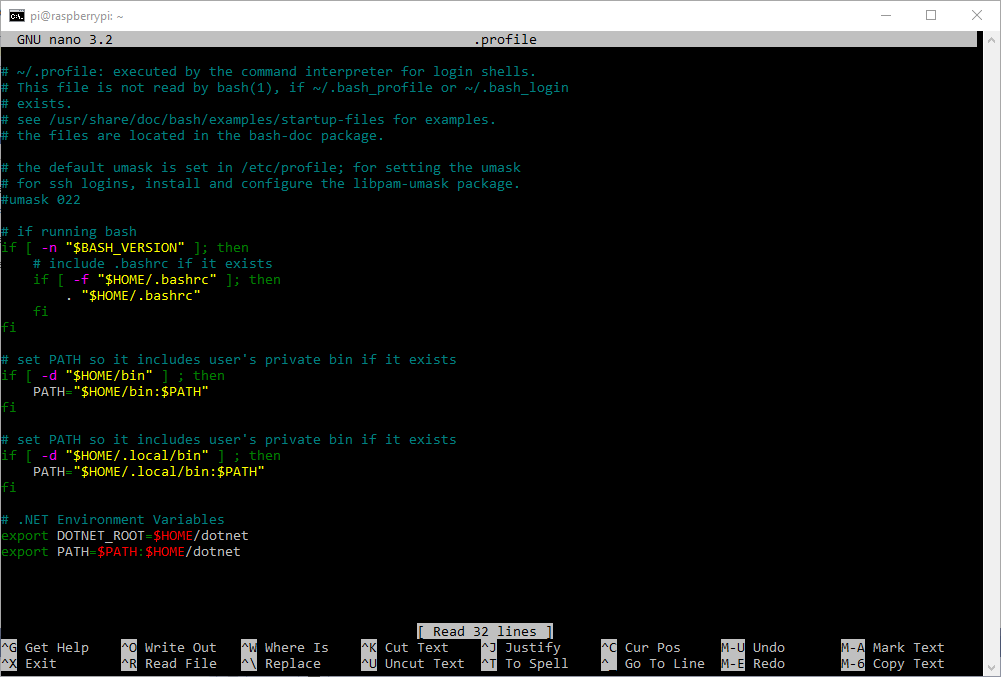
- At the bottom of the file add the following lines (see my screenshot of the .profile file below).
export DOTNET_ROOT=$HOME/dotnetexport PATH=$PATH:$HOME/dotnet
- Type
Ctrl + oto save. - Hit
Enterto save the file with its original name (.profile). - Type
Ctrl + xto exit the editor.
- From the home directory run
Note: Updating the .profile file is important to do so that the dotnet command is available to all terminal sessions in the future on your Pi. If you do not update the .profile file, you will have to reset the environment variables (step 6) every time you open the terminal.
Note: The .profile file is a “startup file” that runs on startup of the Pi and initializes variables and functions.
The End
Boom, you did it! Thanks for Reading!
As mentioned earlier, Edi Wang’s article goes on, to show you how to create some simple .NET apps and ASP.NET web apps directly on/for the Pi. Be sure to check it out!!